Psssst. . .come here. You want in on a secret? You want the recipe for the BEST tasting gluten-free pizza crust that will EVER pass your lips? Ok — well, listen — this crust is NOT really a secret. In fact, it’s been posted on countless sites BUT not with this method — I do one thing different from everybody else but this one thing, makes ALL the difference. So if you’ve tried a crust like this before and had it FAIL because it ended up soggy or you had to eat it with a fork, stay tuned for the recipe and the one simple change that makes all the difference.
Gluten-Free Pizza Crust: A Journey
Going gluten-free has been a challenge for me, to say the least. Not so much because I absolutely NEED wheat in my life but because I just NEED the freedom and variety to cook and eat what I like and have it taste good. Going gluten-free and cutting down on starchy carbs in general, leaves one feeling like “Oh, are we eating grilled meat with veg again, tonight?” I mean where’s the fun in that? (And BTW, for a confirmed foodie this is akin to death.)
My family likes pizza — what family doesn’t really, right? And before our little trek into minimum carb city in the province of gluten-free, I would make homemade pizza around once a week (usually on a Friday as a special “we’re heading for the weekend” treat!)
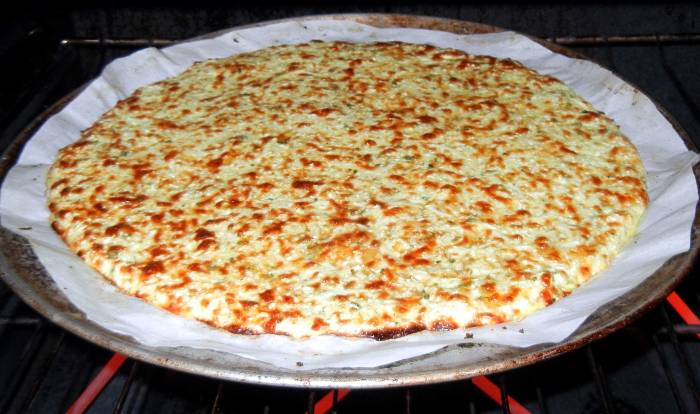
Now, there are those that will say pizza is bad for you, high in fat and calories, etc, etc but in my house we choose to believe that REAL food is not bad for you (if eaten in the proper portions.) Still, when I made pizza, I worked hard to find just the right homemade pizza crust recipe for our tastes (we like thin, slightly floppy, chewy, sorta NY style pizza crust — no deep dish or crunchy crust versions in our house.)
But I also wanted it to be the best possible version nutritionally, for my family — so I developed a whole wheat version and it was the yummiest but NOT gluten-free. We top our pizzas with things like vodka sauce, nitrate-free prosciutto and chicken breast and after it emerges, golden and bubbly from the oven, we liked to pile it high with fresh arugula like they do in Italy.
Sometimes, we kick it old skool with nitrate-free pepperoni or ham and pineapple, or veggies and Italian sausage. I never felt bad about these pizzas because I NEVER over-top a pizza (it ruins the flavor balance and your ability to hoist it to your mouth without a mess) and I always choose the best ingredients, in their most healthful incarnations for my family. But when we went gluten-free, well — we all missed pizza night.
I tried a myriad of gluten-free pizza crust recipes and mixes and though some of them were passable, as “true pizza crust,” none of them matched the texture my family likes in a crust. *sigh*
A Whole Food Solution
It doesn’t matter if you using gluten-free flour or whole wheat flour, if you’re using flour — it’s not as whole a food as it could be. That’s why my gluten-free chocolate cupcakes taste better than ANY that use flour — because instead of flour, I use quinoa (not quinoa flour but quinoa.) Because of this success, I have been looking for foods in their more whole forms to replace items that are carb-y before resorting to their flour-y or starch-y counterparts. We accomplished it with taco night (you’ll see how in next week’s post) and I was determined to make it happen here.
Which is why, when I came across cauliflower pizza crust on the interwebs (truly it’s EVERYWHERE!) my interest was more than piqued. But upon viewing the pics or reading the comments, the same problem kept being mentioned, you have to eat it with a fork or you have to make sure not to make the crust too thin and some versions just plain looked yucky. Still I decided to forge on — the basic ingredient list does not change from recipe to recipe (except for your choice of seasonings) but the process varies some, mostly depending upon whether you have a microwave or not. (I do not.)
Necessity is the Mother of Experimentation
Here’s the thing — I wanted to try this crust out but I wanted a thin crust and I didn’t want to steam my cauliflower and then put it through a ricer. I also didn’t have a microwave, which nearly everyone who makes this crust counsels you to use because of the fact that moisture is pulled from the food instead of locked in, like with steaming. But I wondered — what if I didn’t precook the cauliflower at all? What if I just cut it fine enough to begin with that all it would need is the basic oven cooking time to cook through?
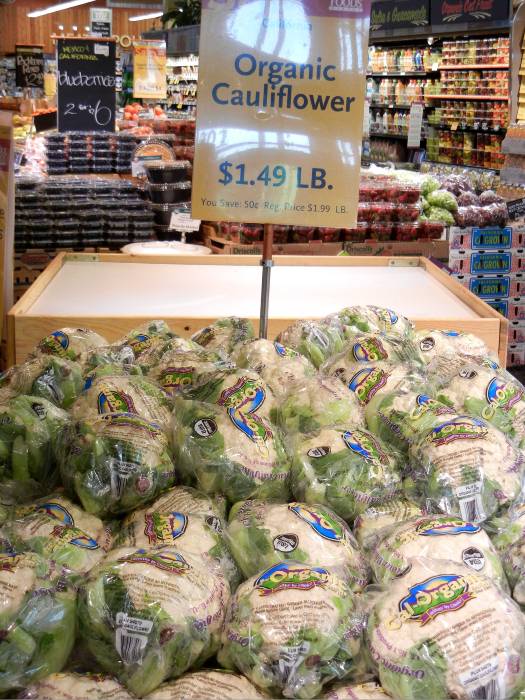
Instead of messing about — I did just that. I grabbed an organic head of cauliflower from and I cut it up and fed it through my processor, using the grating blade. Very little actually gets grated, you see, instead the floret crumbles into a ton of tiny pieces and any stem large enough will then be shredded fine like cheese.
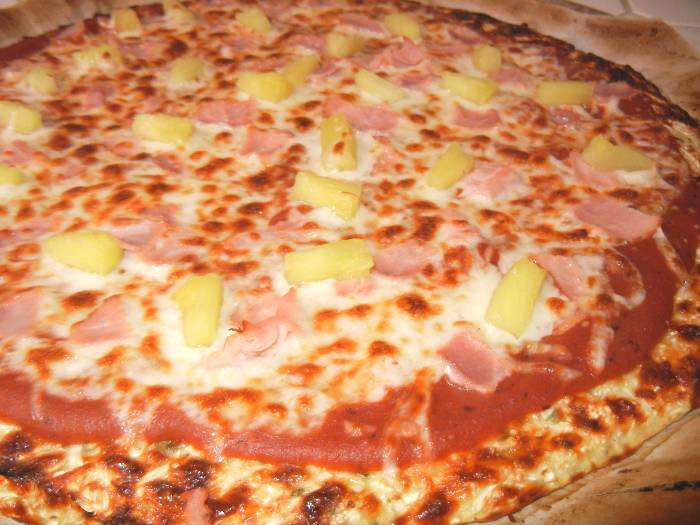
Then, I assembled the rest of the ingredients, pretty much in line with every recipe out there, and the result was a beautiful pizza, that the whole family loved (my son ate the whole thing and he usually picks his toppings off ANY crust!) It was thin, chewy, slightly floppy and we could pick it up with our hands just like the real deal NYC style (gluten-free) pizza — YUM!
One Problem: It’s so good and SO easy (much easier than making pizza dough) that we’ve had it three times already in 2 weeks! I’m sure we’ll taper down once we get all caught up on the pizza Fridays we missed. *wink*
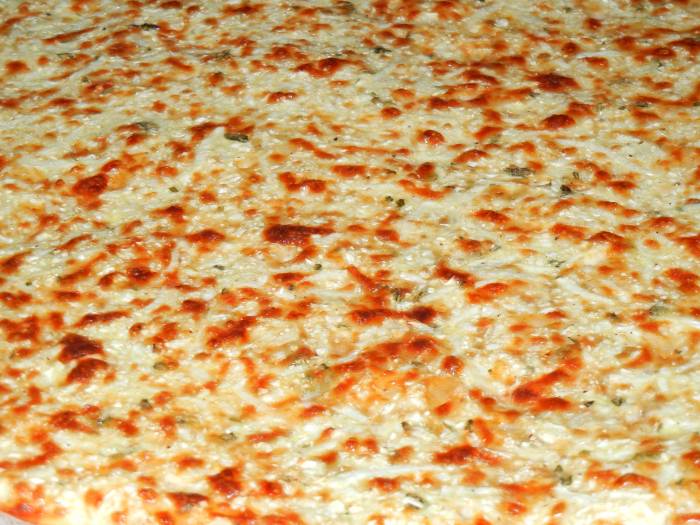
Whole Food (Gluten-Free) Cauliflower Pizza Crust
Ingredients
- 2 cups raw, shredded cauliflower
- 1 cup shredded mozzarella cheese
- 1 large egg
- 1 tsp garlic salt
- 1 tsp Italian seasoning blend
- 1-2 tsp extra virgin olive oil
Instructions
- Preheat oven to 425 °F.
- Tear off enough baking parchment to cover your pizza pan, trim to size and shape of your pan.
- Combine ALL ingredients in a large bowl, stirring until completely incorporated.
- Dump the contents onto your baking parchment trying to lay it out evenly upon the center of the paper. Then, press the crust out in the desired thickness (this will also determine its width– our thin crust makes a 12 inch pizza.) Be sure to follow the shape of your pan and create a smooth edge for a “true” pizza experience (the more something looks right, the better your brain is at accepting the substitution — if it’s good!)
- Rub the 1 to 2 tsp of olive oil on your hands and then pat the top of your pizza crust, making sure to get all of it. (I’m sure you could use a non-stick cook spray here too, just be sure not to put too much oil on top.)
- Bake, the crust only, in the oven for 15 minutes or until golden browned. Remove from oven and add the sauce and toppings of your choice (we used ham and fresh sliced, Fair Trade pineapple to really make our pizza sing!)TIP: Be sure not to overload your pizza with toppings — not only for flavor but stability.
- Pop it in the oven (on broil) for 2 to 3 minutes or just until the cheese is melted, golden and bubbly. Remove from oven and let sit for just a moment or two to allow the cheese to congeal (the way you would with any pizza) before cutting and serving.
Happy Eating!

Wanna Read more about what Fair Trade Pineapple is and what it means to the people who grow your food? Check out this great piece on The Whole Story (Whole Foods Blog).



Looks great, Ness! I’ve seen similar recipes around and have always been curious.
It’s truly awesome Rachel, I hope you get a chance to try it out.
I saw this on Pinterest and was interested in your secret to holdable cauliflower pizza crust. 🙂 It sounds great except that we don’t have low-moisture mozzarella in Germany. We only have the kind that’s in the water and no matter how much I drain it, it’s just not like the kind in the US. Oh well. Maybe I’ll try with cheddar! It definitely sounds good. 🙂
You can achieve the same effect with cheddar or monterey jack cheese, though with cheddar there will be a little orange colored grease to attend to. Just allow the pizza to set a few minutes after baking to congeal a bit more with cheddar and blot the crust dry with paper towels before putting your toppings on (you can of, course use the “good” mozzarella, packed in water, to top your pizza by draining and squeezing any excess water out before slicing to to top your pie. 😉 Best of luck!
Cool, I’d like to try this! (Do you think cauliflower gluten-free pizza crust is better than with garbanzo bean/chickpea flour?)
Success! 6 yr old cauliflower hater loved this recipe 🙂 Recently found him to be gluten intolerant and this is a nice replacement for regular pizza. He asked for 2nds, even knowing that it was made from cauliflower. Thanks for the recipe, will definitely use again!
So glad he liked it — my 4 year old loves it too. Even my mother-in-law (who only likes “normal food”) fell in love with it.
Found this recipe while searching for gluten free pizza crust ideas. I made it tonight and wanted to say thanks for an outstanding recipe.
Thanks for the compliment Mike — gratified you enjoyed it.
I’d really love to try this – it sounds so great, but I can’t do lactose either. Wonder if there’s a substitute binding agent that would work?
You should try SoySation’s shredded soy cheese in the recipe — the texture and melting qualities of this particular brand make me think it would work really well in this recipe. I would be sure and wait the 5 to 10 minutes after taking the pizza out of the oven to let the crust set before cutting and serving (this is true with the original recipe as well.) If you try it out, will you please comment back and let us know how it turned out? Best of luck! — Groovy Foody
You might check out Daiya cheese shreds, also. Mozzarella and Cheddar styles available. They’re soy free, if that makes a difference to you. 🙂
You are second person to recommend them to me — I might just have to try them now. Boy would that pizza be guilt-free then, huh?
Other versions of this recipe I’ve seen call for 1 cup of cauliflower per 1 egg/1 cup cheese… did you intentionally increase the cauliflower for some reason? Or is it because when the cauliflower is raw it’s got more volume than when it’s cooked?
The other recipes you are referring to are completely different approaches (they cook their cauliflower as well as have different amounts) and completely different results (they usually have to be eaten with a knife and fork.) This crust is designed to be held and eaten, just like regular pizza crust. This is why my amounts differ and why I use raw cauliflower instead of microwaved or riced cauliflower — the texture difference is significant.
Made this tonight and while the flavor was good, we had to use forks and it was softer than the way I usually make it with cooked cauliflower (my trick is that I grate the cauliflower raw, steam it lightly, then dump it into a tea towel and wring/squeeze all the liquid out before adding the other ingredients– makes the crust much firmer, although it is more work). I couldn’t pick this crust up without breaking until it was cold, and even then it was really floppy. To each her own, I guess!
Sorry you had a bad experience Rebecca– you’re the FIRST person to say this didn’t come out for them. Most people are delighted at how they CAN pick up this crust when, with other cauliflower crusts, they cannot. I can only think that maybe you missed the blog post BEFORE the recipe, where I outline my requirements for a good pizza crust: thin, foldable, floppy — like NYC style.
If you were looking for something crunchy or that would work as a deep dish, that may be your problem. I can assure you that the crust (and we’ve eaten it WAY too many times!) can and does hold and carry well, while it’s still VERY warm. We’ve never had the problem you stated. In my house, any pizza that needed to be eaten with a fork would be treated with the utmost disgust. lol If you ever figure out what the glitch was, let me know.
Mine turned out really crumbly too. I’m going to try it again, as it tasted really good. I think it might have been because I used a Magic Bullet instead of a blender, and it turned more into cauliflower mush instead of shredded cauliflower. Will return with further details.
I don’t use a magic bullet or a blender — both would release WAY too much moisture. I use a food processor on a grate setting. It grate the cauliflower (looks like grated cheese) and it remains dry in texture until mixed with the cheese and egg.
i never heard of crust made this way, so I a wondering if it taste like a bread crust, or does it taste like your eating veggies?
Hmmmmmmm, Well — that’s a great question. It taste more like eating a crustless pizza. Mostly you just taste the toppings (you certainly don’t taste the cauliflower) but you don’t have a yeasty dough flavor either. Mostly it tastes like mozzarella cheese with sauce and toppings (the cauliflower just gives it something to adhere to so it has a bit of substance.) I highly recommend trying it. Cauliflower is one of those easily hidden veggies (for those who don’t like the taste — like my 4 year old — who devours this pizza!)
Really want to try this. Do you save the shredded cheese for topping, or is it in the original mix…
The cheese is for the crust recipe. Any additional cheese is up to you in what you decide to top with.
ooops, also, what is the best way to shred the cauliflower? I tried with the manual cheap verson, and it ends to cumble rther than shred
I use my Cuisinart on the grater setting (the florets will crumble and the stems will grate like cheese — you can use all of it.) Just do not cook it prior to assembling for the oven. Enjoy!
This turned out just as you said. Perfect!!! I was able to pick it up and eat without using a fork. Also it reheated in the broiler very nice as well. Thanks for this recipe it will be a new favorite in our home.
So glad you liked it! 😉
Will have to try this recipe. I’m on the hunt for a decent GF pizza crust. Still haven’t had a great one. Not to be a debbie downer but garlic salt and store-bought seasoning blends frequently do have gluten in them. Small amounts but nevertheless if you are Celiac it could be an issue. Solution: Make your own it’s really easy and better, fresher results.
You are correct Patrick, I forgot to mention that in the piece because I am so used to the brands I buy being pure herbs or spices. It is generally the seasoning packets, blends or inferior brands that may contain gluten. But the good news is there are many companies committed to making certified gluten-free seasoning products in their lines like Simply Organics,Spice Islands Organics who has a GF policy, and Chef Paul Prudhomme’s New Salt and Sugar Free Seasoning Blends. Here’s a great tool to help you find the brands for any ingredient you might be looking for that are Gluten-free! It’s called GFOverflow this exhaustive database even includes health and personal care products. Enjoy!
hmmm, Cauliflower never agrees with me. However, I wonder if it would work even better if you were to juice the cauliflower discarding the juice and using the pulp for the crust. and perhaps mixing in some flax meal? I never can seem to follow a recipe 😉
I like the dry cheeses on my pizza, parmesan, goat cheese, and maybe a few bits of preservative free bacon. All of that sprinkled over a pesto sauce…. yummy!
Hi Sarah — As with most foods we react to, I would bet that juicing would not eliminate your problem with the cauliflower. Do you have the same problem with broccoli? If not this would be a perfect substitution in this crust, that, though green is not the pizze crust normally looks coud just add to the emerald of your pesto-lisciousness. I’ve also been curious as to whether grated carrot might work. Maybe I’ll experiment with an all veggie bottomed pizza crust. Thanks for the inspiration.
This may sound dumb, but do you mix the 1 cup of mozzarella into the “flour” itself; or just add it to the top?
Hi Amy– Sorry for the confusion. This recipe is for the crust only (it contains no flour). The directions read “Combine ingredients in a large bowl, stirring until completely incorporated.” I will amend them to read “Combine ALL ingredients in a large bowl, stirring until completely incorporated.” to avoid any future confusion, but YES! mix the cheese into the cauliflower, seasoning and egg mixture and assemble and bake as directed. Then top with whatever you like (even more cheese!) and pop it back into the oven as directed. Enjoy!
Hi! I was wondering if anyone has experimented with this using an egg replacer? I plan on trying this, nonetheless. I’m also hoping that my less fancy food processor (which does not have a grating setting) will do the trick.
I cannot guarantee results when you use the blade attachment on a food processor (I use that to make Faux Fried Rice out of cauliflower and the structural consistency is somewhat different than what we’re going for here.) In this recipe, the stalk of cauliflower grates, like the mozzarella cheese does (the florets, of course, do not) but those matching lengths and widths from the stalks, when added to the cheese create a structure you can hold.
I’m sure the pizza will taste the same your way, but it may not end up being able to hold it with your hand, while you eat it. Unfortunately, I have never tried it with egg replacer either so I cannot attest to whether or not it will work. In this case the egg is used as a binder — not as leaving or for moisture. So as long as your replacer can act in that manner, it may work.
Let us know how it turns out.
Hi! This sounds like a great idea but I was wondering if the results would vary much if a hand-grater was used in place of a processor. What do you think?
Hi Kevin — I think if you can hand grate the cauliflower without grating your knuckles or if you have one of those levered, churning sort of hand graters the result should the same. (Ya know, something like this: http://www.inthehaus.co.uk/categories/gefu_tools.php?startpos=116 )
Bonne chance! Tell me how it works out.
I think it turned out the way it was supposed to. However it was really floppy, floppier than the usual floppy-style pizza I get. Hand grating could be the culprit or maybe not. Seemed much more on the omelet side of things for me. Thanks for the idea though!
Thanks for being our guinea pig, Kevin! Because of your efforts some other poor soul will know that the results will not be ideal with hand grating. I can assure you, it is NOT omelet-like when grated with a processor. Hope you get to try it that way one day!
could i add butter oil/ghee instead of olive oil, or coconut oil? has anyone tried this recipe in a stone oven? curious about the crust getting those lovely brown crunchy air bubbles in it. would adding coconut flour help anywhere? sorry for the question flurry, i have no time to test anything myself right now.
*You could try ghee (because the milk solids have been removed from the butter through a clarifying process and you’re just left with oil) but I would skip regular butter.
*You need the oil to seal the cheese/cauliflower mixture, helping to make the crust pliable and able to hold with your hands, instead of cutting with a fork. (I’m curious as to why you don’t want to use olive oil — it’s perfect flavor wise and excellent nutritionally.)
*I haven’t tried it in a pizza oven but as long as it gets to the right temp and you use the baking paper (in order to keep the cheese from sticking to the stone)it would probably work just fine.
*I would NOT however add coconut flour to this recipe. There are plenty of GF pizza crust recipes out there that utilize coconut flour (here’s one!), if you need a flour-based crust but adding coconut flour to this would turn it into a gloppy mess.
Let me know what you end up doing and how it turns out!
Happy Cooking!
Ness
15 minutes…still now brown…followed recipe to a “T”, but just leaving in oven little longer…maybe thicker than yours as I put on two personal pan pizza pans.
The recipe needs to be followed EXACTLY as written. Creating a thicker crust will NOT yield the results expected. This recipe (as stated) is for a LARGE thin, NYC style crust. As you can see from the recipe’s popularity and positive comments, many have used this recipe and achieved the same or similar results. Whenever there is an issue, it is because someone has changed something in the recipe. In this case, you put a large pizza crust on two personal pan pizzas. While I’m sure you can bake smaller pizzas with this recipe, you would need to reduce the amount of crust mixture put on each personal pizza — you cannot make a regular or thick style crust with this recipe and expect not to have to use a fork. But if you make it thin, you will be able to hold it in your hand and enjoy a very tasty, GF crust that most cannot even tell the difference in.
BTW, because we are dealing with a high water vegetable, cooking this crust longer will NOT achieve desired results. The longer one cooks cauliflower, the softer it gets — this is why I do not steam or microwave the cauliflower ahead of time. In fact, if you leave it in longer, it will result in a soggier texture to your pizza. Try the recipe again, on a large pan, as written at a thin level, using baking parchment and topping with a thin layer or cooking spray of olive oil for the time stated and it will brown and bubble right up. Once the crust is baked then add your toppings and bake for the additional minutes. (You will notice in the recipe I have also been careful to note — do NOT overload your pizza with toppings. The more moisture or weight you introduce the less desirable the results.) If you don’t feel comfortable with the constraints of this recipe, please look for another one made with GF flour.
I tried this recipe last night as I am a celiac. It looked nice and simple as opposed to so many recipes with so many ingredients. It was easy to make and it turned out wonderful and tasted awesome. Thanks Vanessa for adding another choice to my options as a celiac.
So glad to be of help Jim! If you like this one, you’re gonna LOVE my gluten free chocolate cupcakes. Take a look and try ’em out when you have some time.
Has anyone tried making just the cauliflower crust and freezing it? It would be great to make about 5 of these at once and just freeze the crust and pull out, put the toppings on and bake it up! By the way, I made it the other night. We loved it and are planning to try it out on our 6 year old this weekend!
Is it alright to bake the crust a bit earlier (say 1 hour) before you put on the toppings and put it under broiler? I ask because I want to transport the crust to a friends and then just have to put on the toppings.
I would mix it up and even press it out on a pizza pan, then wrap it in Saran Wrap and keep in the fridge until time to go, then do both parts of the baking process at her house. I will only take 15 minutes tops. If you do the first bake an hour earlier it will sog up. Hope this helps.
I made this tonight and while it was super good it was a little soggy, so I wonder if my cauliflower was too damp. Next time I’ll try squeezing it in a dish towel beforehand. Overall it was super though.
If you cooked your cauliflower before making the crust — then, yes, it was probably too damp. I use raw in this recipe to avoid the dreaded sog. Also, watch cooking times carefully and use the baking paper etc. One small change to the recipe could have BIG effects. Better luck next time! (Let me know how it works out.)
could you use a pizza stone for this instead of parchment paper? if so, would that alter any of the cooking time?
Pizza stone will make it come out soggy. You need a traditional pizza pan or Air Bake pizza pan (this is the kind I use and it’s my favorite by far – and I’ve tried everything, including those heavy stones. I use the Natural Perforated Pizza Pan) and parchment paper (the paper helps you hold it all together before it’s baked and remove it easily once it’s done.) http://www.t-falusa.com/All+Products/Bakeware/AirBake+Bakeware/Products/AirBake+Natural+Insulated/Natural+Insulated.htm